Imagine cutting your time-to-hire in half without sacrificing candidate quality. It sounds like a dream, but it’s entirely achievable with the right tools.
One of the most powerful yet underutilized tools in recruitment is the hiring process flowchart. This simple yet effective visual representation can revolutionize the way you hire.
A hiring process flowchart is more than just a visual aid. It’s a strategic tool that can transform how you approach recruitment. By mapping out each step, from job posting to onboarding, you gain clarity and control.
This guide will walk you through creating an effective hiring process flowchart, helping you streamline your recruitment efforts and attract top talent with ease.
Ready to make your hiring process smoother and more effective? Let’s dive in and start building a flowchart that works for you.
What Is a Recruitment Process? — Steps Involved
Imagine Sarah, a busy HR manager at a growing tech company. She’s swamped with resumes, struggling to keep track of interviews, and feeling the pressure to fill key positions quickly.
One day, she misses out on a top candidate because her process isn’t streamlined. Frustrated, Sarah realizes something needs to change. Frustrated, Sarah realizes something needs to change.
To improve her process, she decides to review the steps involved in a recruitment workflow to understand where to start and how to proceed.
10 Steps in the Recruitment Process
Mastering the recruitment process is essential for attracting and securing suitable candidates. By following these ten steps, you’ll streamline your efforts and ensure a smooth journey from job opening to new hire.
- Identify Hiring Needs: Determine the requirements for the position and the qualifications needed.
- Create Job Description: Write a detailed job description outlining the responsibilities and required skills.
- Advertise the Job Opening: Post the job on various platforms such as job boards, company website, and social media to attract suitable candidates.
- Screen Applications: Review resumes and cover letters to shortlist candidates.
- Conduct Initial Interviews: Perform initial phone or video interviews to assess candidates’ suitability.
- Administer Assessments: Use assessment tools or tests to evaluate candidates’ skills and competencies.
- Hold In-depth Interviews: Conduct detailed, in-person, or virtual interviews with shortlisted job candidates.
- Check References: Contact references to verify candidates’ backgrounds and qualifications.
- Make a Job Offer: Extend a formal job offer to the selected candidate.
- Onboard the New Employee: Facilitate the onboarding process to integrate the new hire into the company.
The recruitment process involves several steps designed to attract, screen, and select qualified candidates for a job opening. It starts with identifying the hiring need and crafting a compelling job description. Next, the job opening is advertised across various platforms like job boards and career websites.
Once applications start coming in, the screening phase begins. This involves reviewing resumes, conducting initial interviews, and possibly using assessment tools to shortlist suitable candidates in the overall recruiting process.
After narrowing down the pool, more detailed interviews and evaluations follow. The final steps include making a job offer and onboarding the new employee.
Each of these stages is crucial. However, without a clear structure, it’s easy for things to go awry. For that reason, a flowchart can make a significant difference. By visually mapping out each step, you can ensure a smooth and efficient recruitment process, ultimately leading to the successful hiring of top talent.
What Is a Hiring Process Flowchart?
Imagine you’re trying to assemble a piece of furniture from a furniture company like MGK Asia without any instructions. Frustrating, right? The same goes for hiring without a clear selection process. That’s where a hiring process flowchart comes in.
A hiring process flowchart is a visual representation of each step in your recruitment process. It breaks down the journey from identifying a job vacancy to onboarding a new employee. This tool helps you see the big picture and the finer details, ensuring nothing gets overlooked when human resources get involved.
We’ve already reviewed the steps involved in the recruitment process (the general and most common because the specific and many more depends on your company culture and the recruitment and selection process you might have). Now, let’s see how mapping these steps into a flowchart can enhance your hiring strategy.
How to Create a Hiring Process Flowchart
Imagine trying to bake a cake without a recipe. You might end up with a mess rather than a masterpiece. The same principle applies to hiring.
Without a clear guide of your recruitment practices, the process can become chaotic, and finding successful candidates can become a nightmare. Creating a hiring process flowchart can turn that chaos into a well-ordered system.
8 Steps to Create a Hiring Process Flowchart
- List All Steps in Your Recruitment Process: Start by outlining each stage of your recruitment process. This includes everything from identifying a job vacancy to onboarding a new hire.
- Organize the Steps Sequentially: Arrange these steps in the order they occur. This helps in visualizing the entire process from start to finish. It has to be to achieve your recruitment strategy and job requirements.
- Choose a Flowchart Tool: Select a tool for creating your flowchart. Options range from simple drawing tools to specialized software like Lucidchart or Microsoft Visio.
- Start Mapping Out the Flowchart: Begin by drawing a box for the first step. For example, “Identify Hiring Needs.” Connect it to the next step with an arrow, and continue this pattern until all steps are included.
- Include Decision Points: Add diamonds to represent decision points, such as “Screen Applications.” If an application passes, it moves to the next step. If not, it goes back to a previous step or ends there. Think about adding as many decision steps as possible to feel assured you will select the right candidates.
- Add Details and Notes: Provide additional information for each step where necessary and the departments involved in each step. This can include key responsibilities or specific criteria for decision points. (For example, when the flowchart will be different if it is an internal recruitment process).
- Review and Refine: Once your flowchart is complete, you will have a visual layout; review it with your team. Make sure it accurately represents the process and includes all necessary steps. Refine it based on feedback.
- Implement and Use: Share the finalized flowchart with your team. Use it as a guide in your recruitment process, and update it as needed to reflect any changes in the key stages.
Creating a hiring process flowchart not only organizes your recruitment efforts but also enhances communication and efficiency. It’s like having a recipe for success, ensuring each step is followed and nothing is missed.
Ready to transform your hiring process into a well-oiled machine? Start mapping out your flowchart today.
Hiring Process Flowchart Template
Here is a recruitment process flowchart template using ANSI symbols, illustrating the various steps in the recruitment process.

- Identify Hiring Needs (Start/End – Oval)
- Create Job Description (Process – Rectangle)
- Advertise the Job Opening (Process – Rectangle)
- Screen Applications (Decision – Diamond)
- Conduct Initial Interviews (Process – Rectangle)
- Administer Assessments (Decision – Diamond)
- Hold In-depth Interviews (Decision – Diamond)
- Check References (Decision – Diamond)
- Make a Job Offer (Decision – Diamond)
- Onboard the New Employee (Start/End – Oval)
This flowchart provides a clear visual guide to streamline your hiring process.
Why Are Hiring Process Flowcharts Important?
Using a hiring process flowchart offers several key benefits:
Clarity and Organization: It provides a clear, organized view of the entire recruitment process, making it easier to manage each step.
Improved Communication: A visual guide helps ensure everyone on your hiring team is on the same page, reducing misunderstandings and errors.
Efficiency: By identifying and eliminating bottlenecks, you can streamline your process, saving time and resources.
Consistency: Ensures a consistent experience for all candidates, which can enhance your company’s reputation and attract top talent.
Accountability: Assigns clear responsibilities for each step, ensuring accountability and better follow-through.
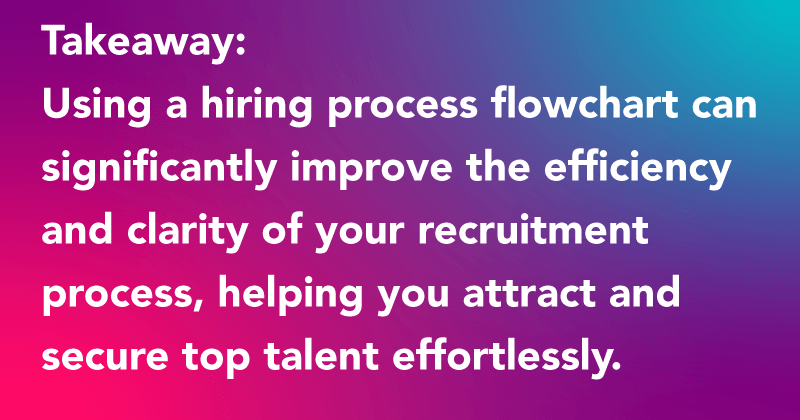
By using a hiring process flowchart, you can transform your recruitment efforts, making them more efficient and effective.
Final Thoughts
Imagine you’ve just finished creating your hiring process flowchart. The steps are clearly defined, and you feel a sense of control over the recruitment process. Yet, the execution still seems daunting. This is where Virtual Latinos can be a game-changer.
Virtual Latinos offers a stress-free solution to your hiring needs. With a diverse pool of talents, we can match you with virtual assistants who fit your specific requirements. Our virtual assistants are not only highly qualified but also pre-vetted, ensuring you get the best support without the hassle of a lengthy hiring process.
Ready to transform your hiring process? Get in touch with Virtual Latinos today and streamline your recruitment with the help of our skilled virtual assistants. Click here to get started and experience the ease of a well-managed hiring process!